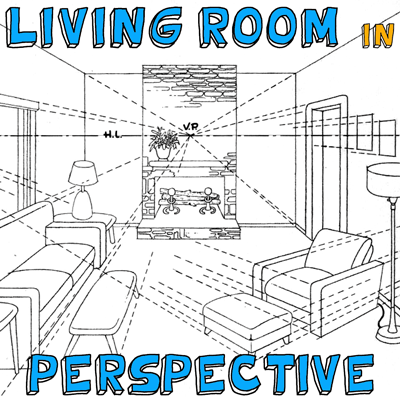
how to draw 3d rooms walls and furniture
This is a semi-complicated cartoon tutorial for a three point perspective drawing of the within of a living room. If you want a more detailed guide to perspective, nosotros accept a few of them here. That is a practiced place to start for beginners perspective cartoon lessons. If you lot already know a trivial fleck about perspective cartoon, you can just enjoy the drawing lesson below.
A Tutorial for How to Describe a Room with Multiple Vanishing Points in Right Perspective
Step 1

First of all, I'd like to apologize for how shaky my easily are today. I'thou not feeling too hot today.
– Get a piece of newspaper out and put it on its side, the long way.
– Use a ruler to draw a straight line across the top. This will be the horizon line.
– Draw a dot in the centre. This volition be your vanishing bespeak. This is where many of the lines will be drawn to.
– There is also a vanishing bespeak to the left, off of the paper (There is also a vanishing point to the right off of the paper). If you lot tape your piece of paper down to the table, this volition keep your piece of newspaper in i spot and then that you can either draw a dot on the tabular array or use tape to mark off where that 2nd vanishing point is. You can wait to effigy out the correct-side vanishing bespeak.
Step two
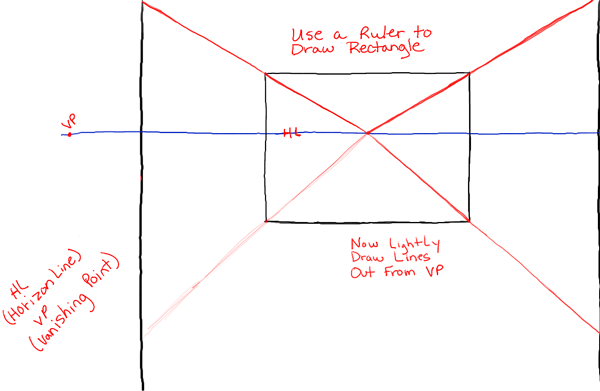
– Now draw a rectangle that is mostly below the horizon line.
– Employ a ruler or directly edge to describe lines from the eye vanishing point outwards…each one going thru one of the corners of the rectangle.
Footstep three

– Erase the parts of the lines that nosotros erased. You now have the outlines of the room in correct perspective.
– Now depict a few rectangles likewise as some vertical lines (lines that go upward and down).
Step iv
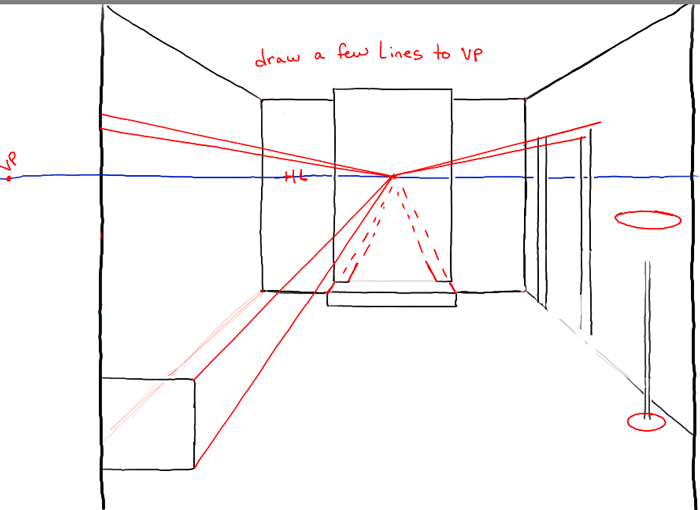
– Use a ruler to once more draw some lines drawn towards the centre vanishing betoken.
– Too depict ovals for the lamp.
Step 5
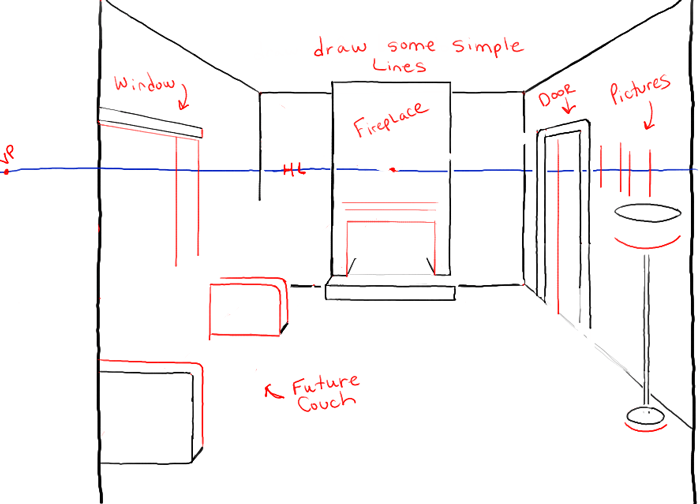
– Again, erase parts of the vanishing point lines that we don't need whatsoever more.
– Now describe some vertical lines, rectangle-ish shapes, and curved lines.
– Discover where the future couch, fireplace, lamp, pictures, doorway, and window will exist.
Step 6
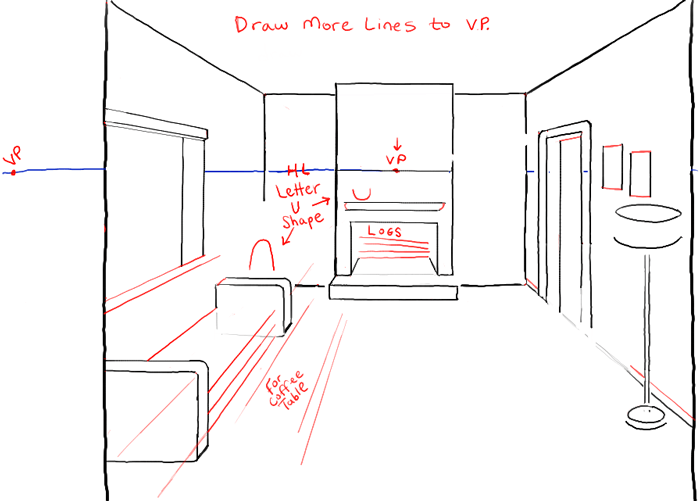
– Again describe some lines to the center vanishing points to form parts of the couch, window, doorway, pictures, and baseboard.
– As well describe ii letter 'U' shapes…one for the table lamp and the other for the bottom of the vase.
– Depict some lines for future logs.
Footstep 7
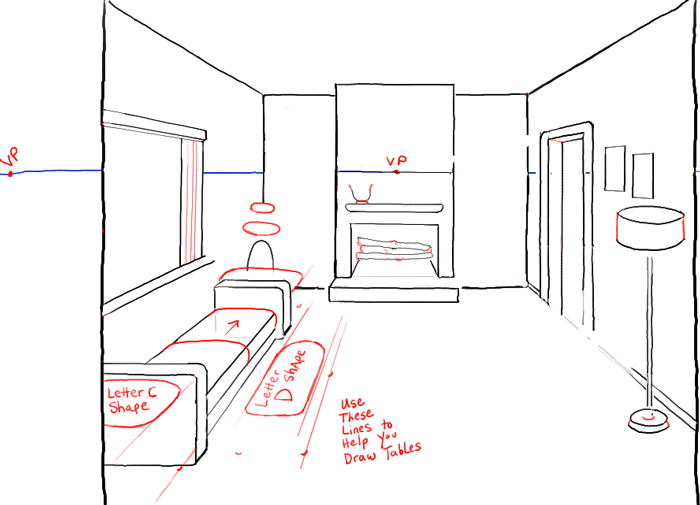
– Add some details to the logs, vase, and lamps.
– Draw some letter 'C' like shapes to the tables and couch.
– Draw a very long shaped, capital letter 'D' shape within the lines we drew in the last pace. This style we are keeping the right perspective as we draw it.
Step 8

– Continue to add details.
Pace 9
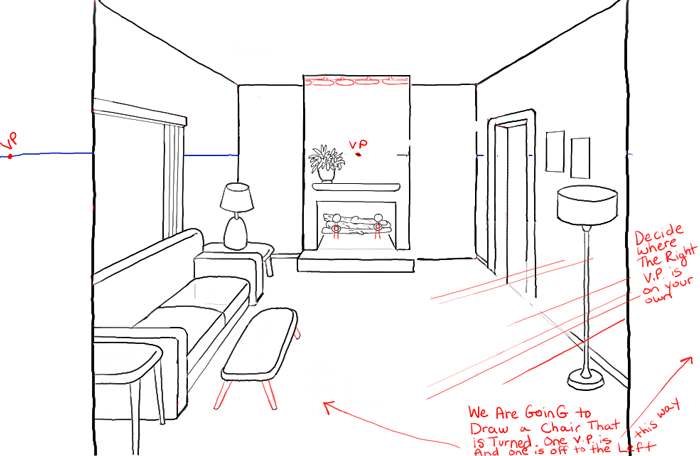
– Depict legs on the java table.
– We are now going to depict a chair that won't use the center vanishing point. This chair is turned on its side and uses 2 separate vanishing points. However both vanishing points are off of the folio. One of the vanishing points, we already drew (on the left). Choose a vanishing point for the right side…either drawing a dot or a using a piece of tape to mark it.
– Draw some lines going towards the right vanishing betoken.
– Start drawing bricks on the fireplace.
Footstep 10
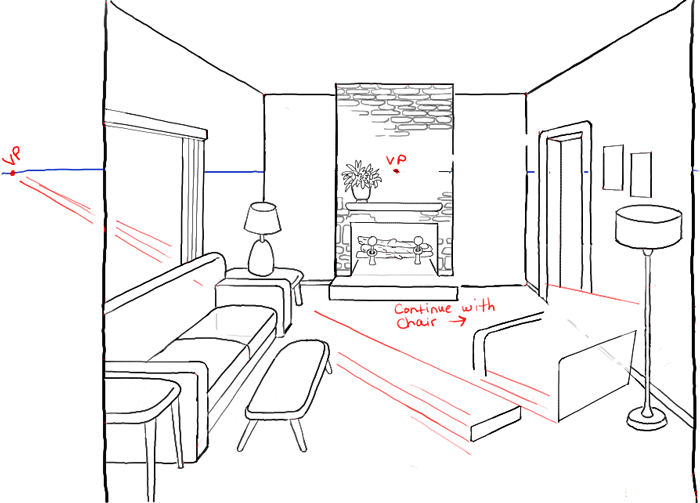
– At present draw some lines going towards the left vanishing point.
– Continue drawing bricks on the fireplace.
Step 11
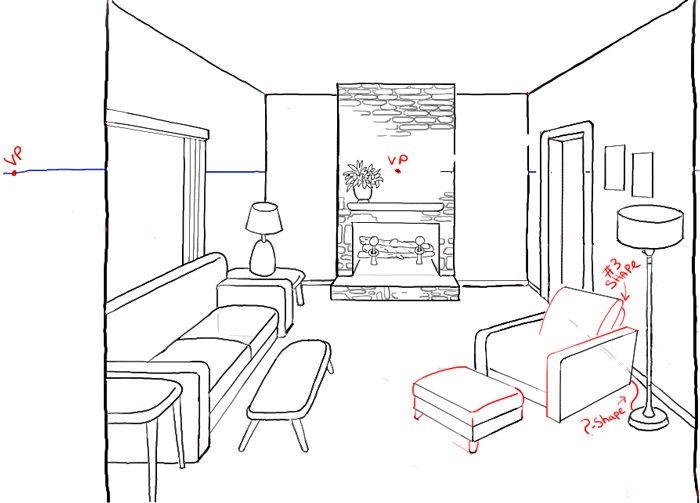
– Continue drawing the chair and ottoman using the lines you drew. Draw a #iii – shape for the absorber'due south side view.
– Draw a ?- shape for the wire coming out of the lamp.
– Draw some more bricks on the bottom of the fireplace.
Footstep 12
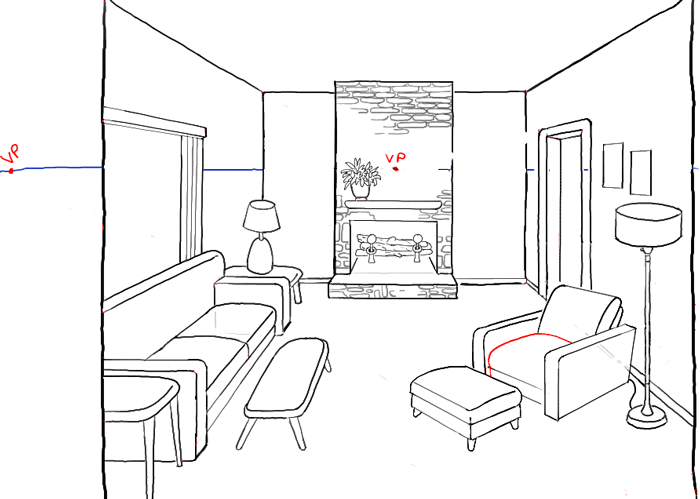
– Finish upwards the chair and any other details that need work.
Finished Drawing of Living Room with Couches, Lamps, Coffee Tables, Chair, Ottoman, and Fireplace
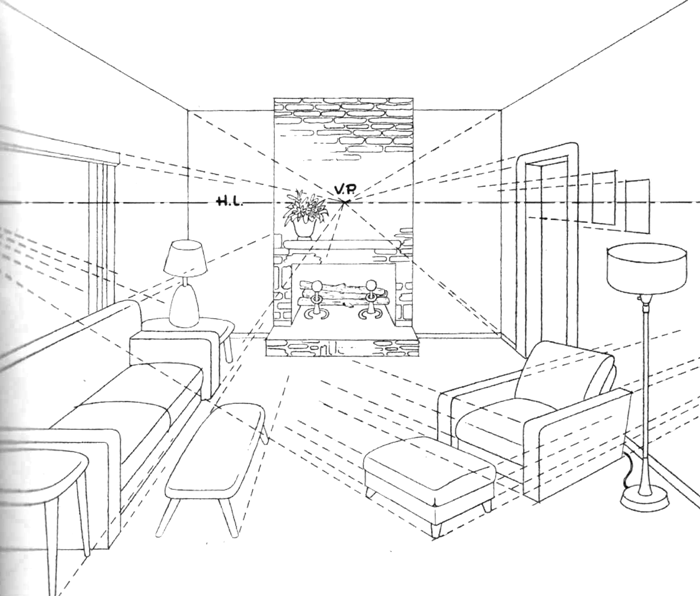
– Erase any lines that you don't need any longer.
Y'all can add together more details to the picture show but you have the basic shapes in correct perspective. This tutorial was done in 3 betoken perspective and you did an crawly job. This isn't an like shooting fish in a barrel chore.
If you lot want a more detailed guide to perspective, nosotros have a few of them hither.
Technorati Tags: iii signal perspective, perspective, perspective drawing, room perspective, living room, couch, chairs, tables, lamps, fireplace

Source: https://www.drawinghowtodraw.com/stepbystepdrawinglessons/2015/01/draw-room-perspective-drawing-tutorial-living-room/
0 Response to "how to draw 3d rooms walls and furniture"
Post a Comment